This post follows the Tricopter V2 build.
I describe how I improved the tricopter video performances by using a gimbal to stabilize the GoPro camera. I also show how I realized a new 3D printed landing gear, which allow to put the gimbal and the GoPro under the drone. At the end of the post, I explain how I designed an FPV camera mount in order to tilt down the FPV camera (for easier FPV landing).
Here is a summary of the drone characteristics and components used in this configuration:
- Frame: David Windestål's Tricopter V3 kit
- Arms: Square carbon booms (10x10x325 mm)
- Flight Controller: Quanton rev. 1 board (similar to OpenPilot Revolution board)
- Motors: T-Motor MT2216-12 V2 800KV
- Brushless Controllers (ESCs): T-Motor T30A
- Props: APC Slow Fly 10x4.7"
- Servo motor (for the yaw axis control): Turnigy TGY-210DMH
- Battery: Zippy 4S 3000mAh 20C
- Radio Controller: Graupner MX16 Hott and GR-16 receiver
- FPV equipment: FatShark Attitude V2 goggles / 5.8 GHz FatShark video transmitter / 600TVL FatShark camera
- Additional camera: GoPro Hero 3 Black
- Gimbal: Walkera G-2D
- All up weight: 1300 grams (including battery and GoPro camera)
A gimbal is a support that hold and stabilize the camera from vibrations and drone moves. Sensors (accelerometer and gyroscope) are used to measure the camera orientation. Two or three brushless motors are controlled to stabilize the camera around each axis from these measurements.
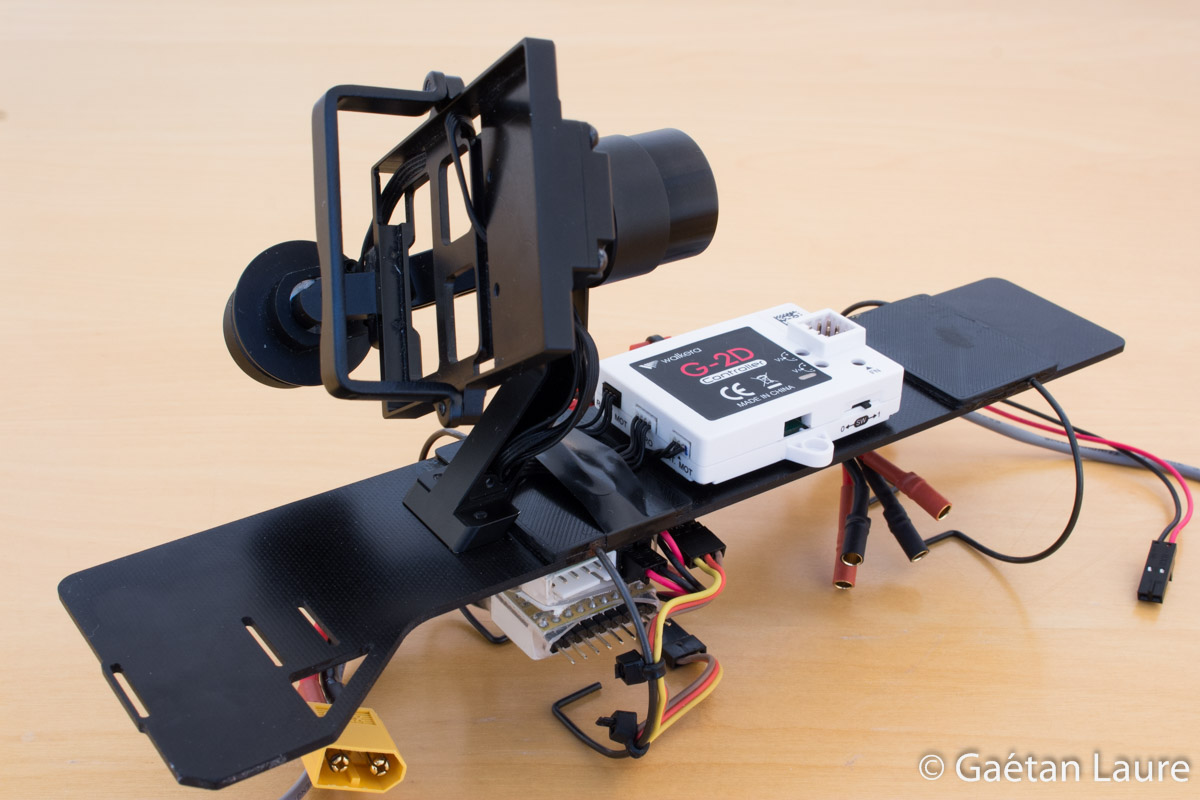
I chose the Walkera G-2D because it's lightweight and cheap.
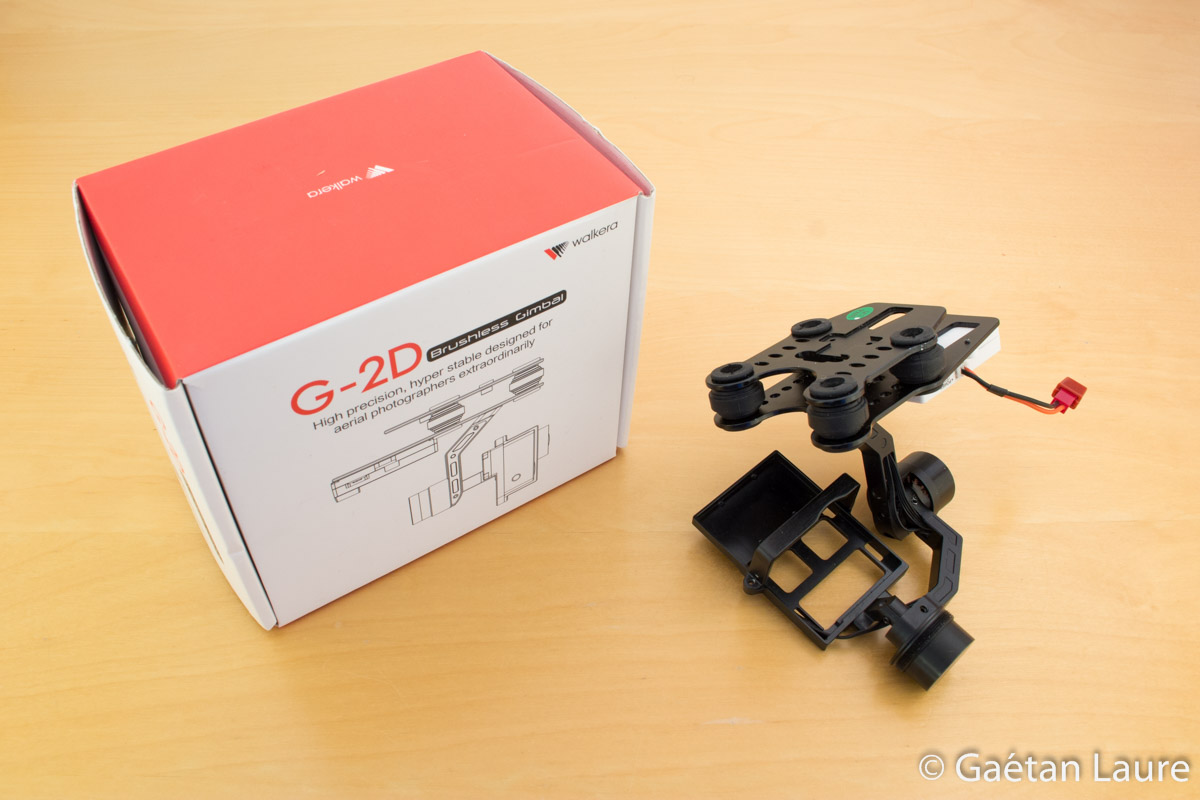
It's only a two axis gimbal (two motors for stabilization around the roll and pitch axis), but it's enough to begin with.
Let's now see how I mount the gimbal on the tricopter frame.
The gimbal could be installed at different places on the frame. I decided to put it under the drone in order to easily preserve its gravity center. It also avoid seeing props in the camera field of view. I then needed to design a new landing gear, to get enough space under the drone.
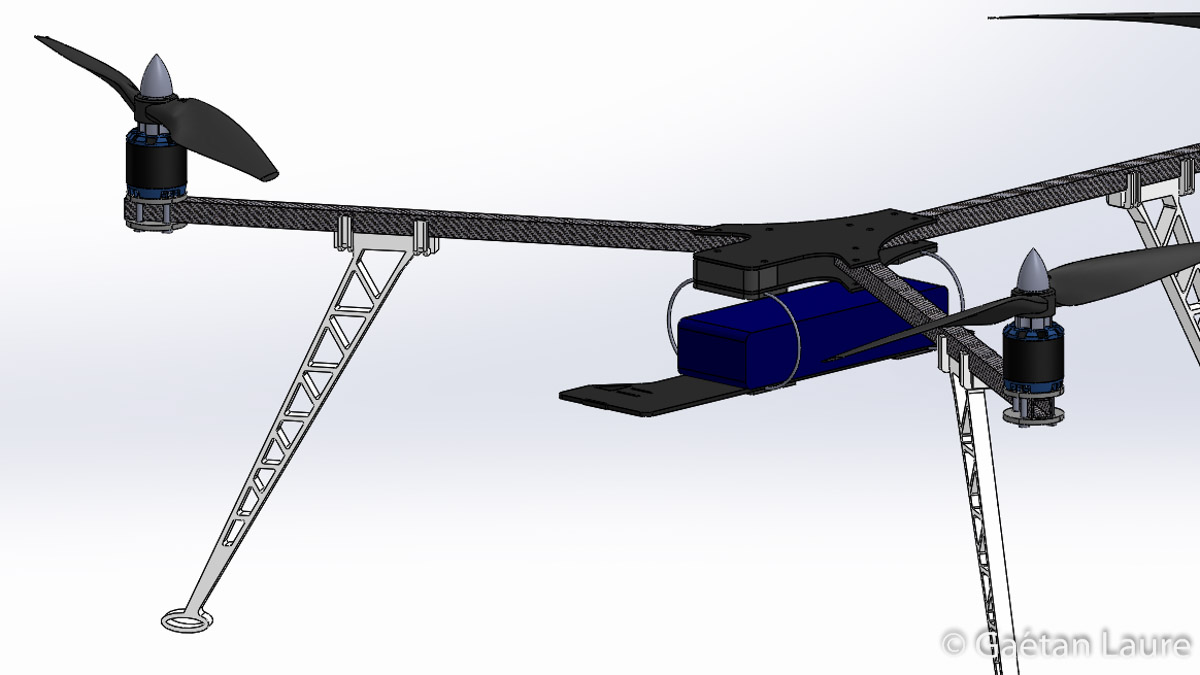
I first modelized the entire tricopter using Solidworks. I then designed the landing gear that fits the arms.

The design is inspired from the Mikrokopter landing gear.
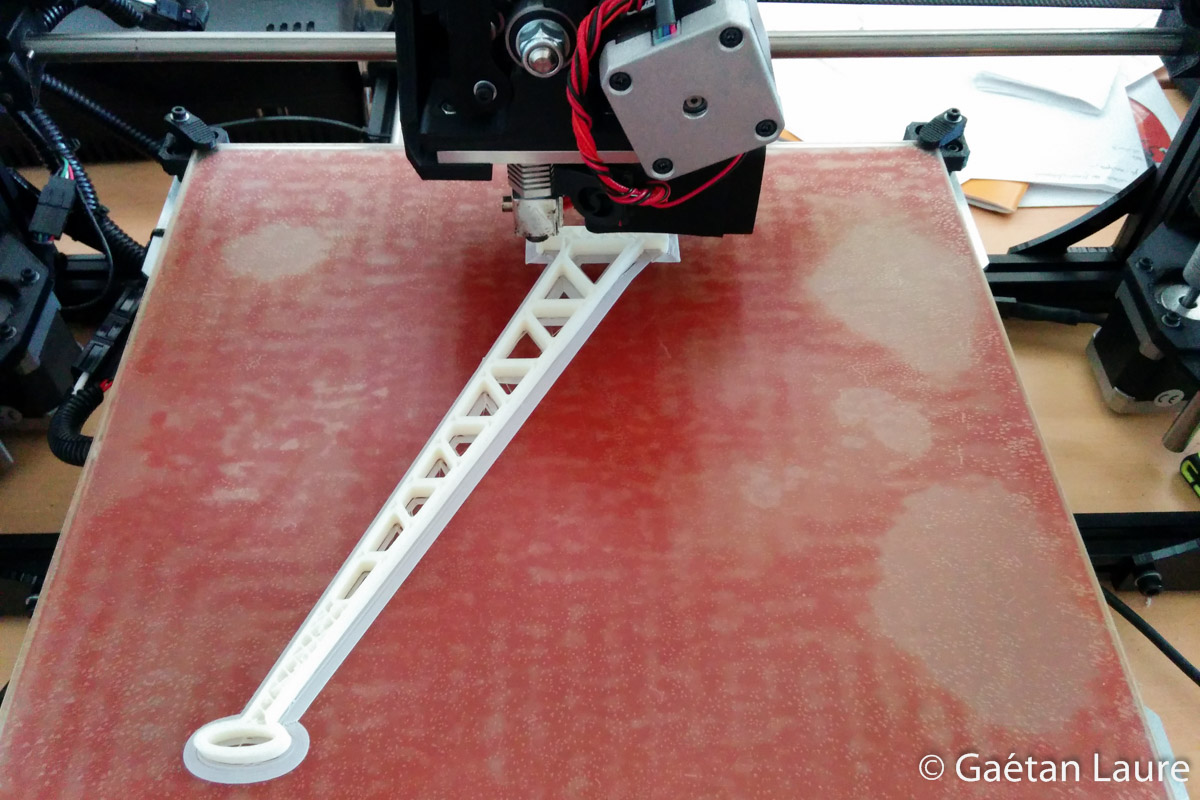
The landing gear is 3D printed using ABS wire to make it enough strong and resistant.
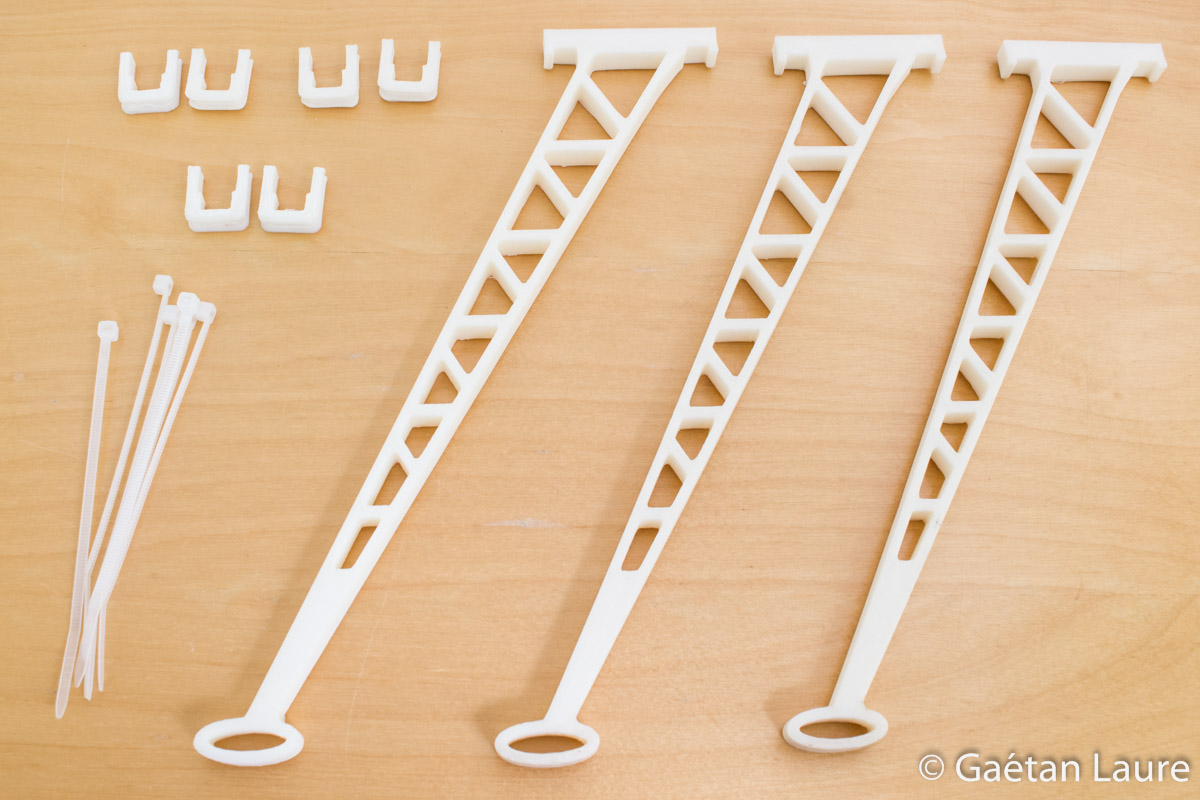
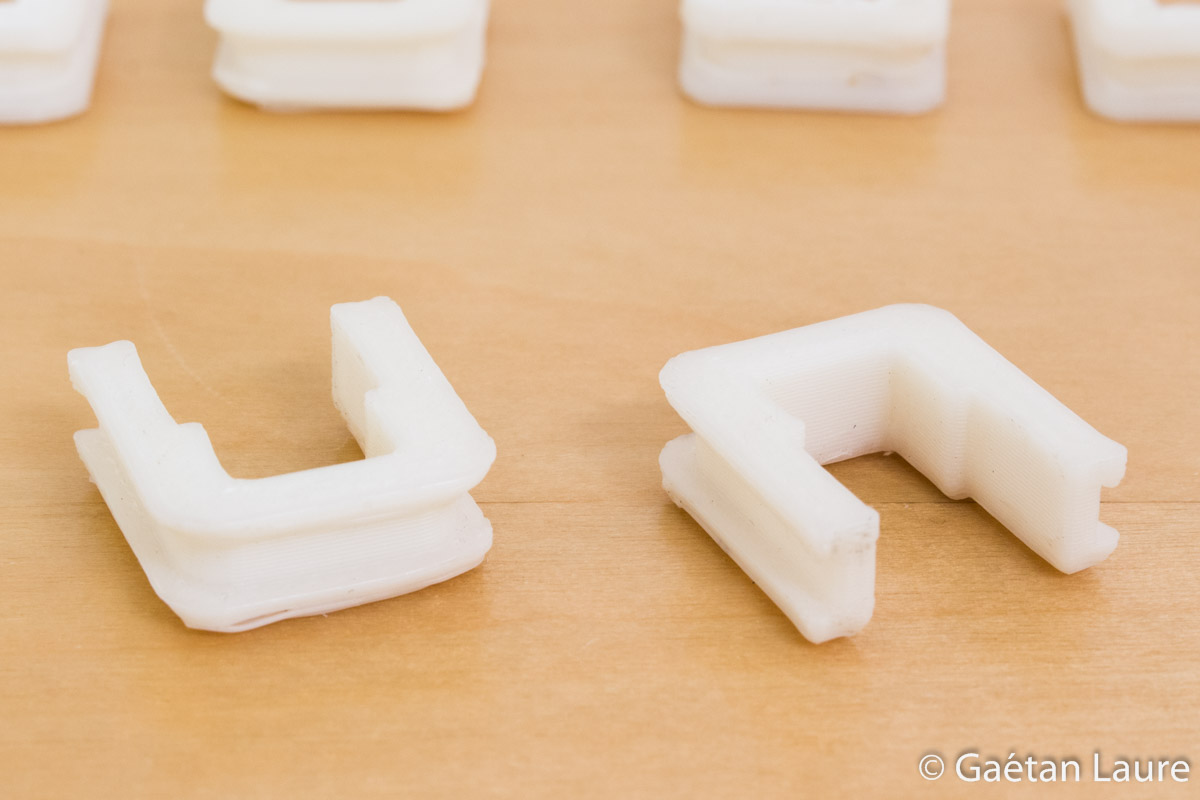
It can be easily attached to the arms using zip ties.

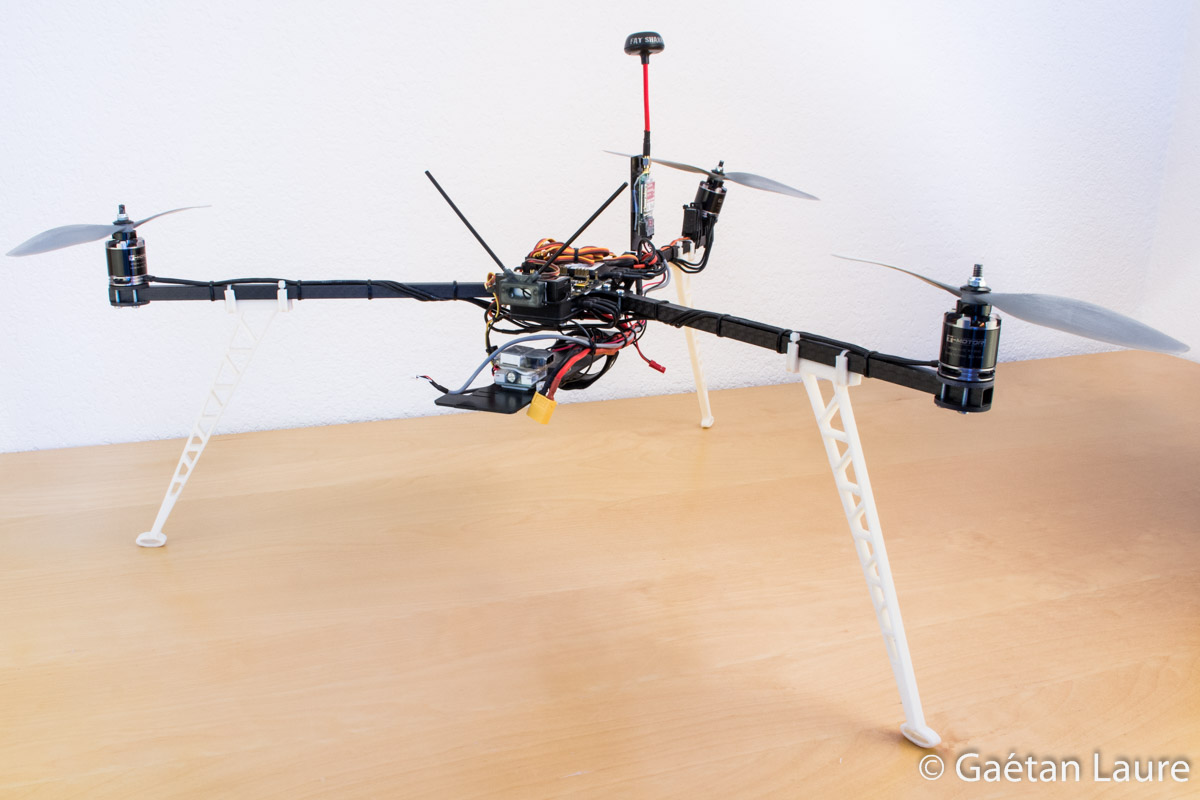
The landing gear mounted on the tricopter.
Now its time to install the gimbal.

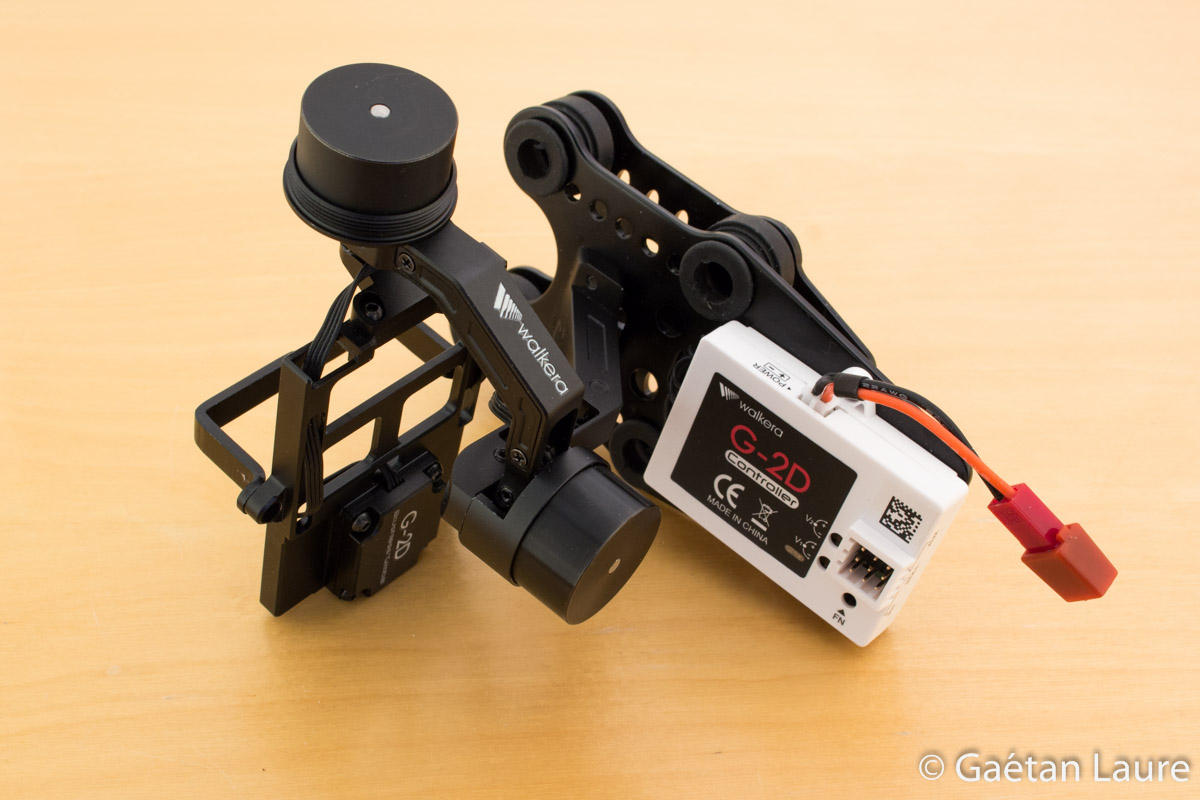
Since the battery tray, where the gimbal is going to be attached, has already vibration damping wires, I'm not going to use the top part and dampers from the gimbal.

Without the top part and dampers, the gimbal only weighs 97g!
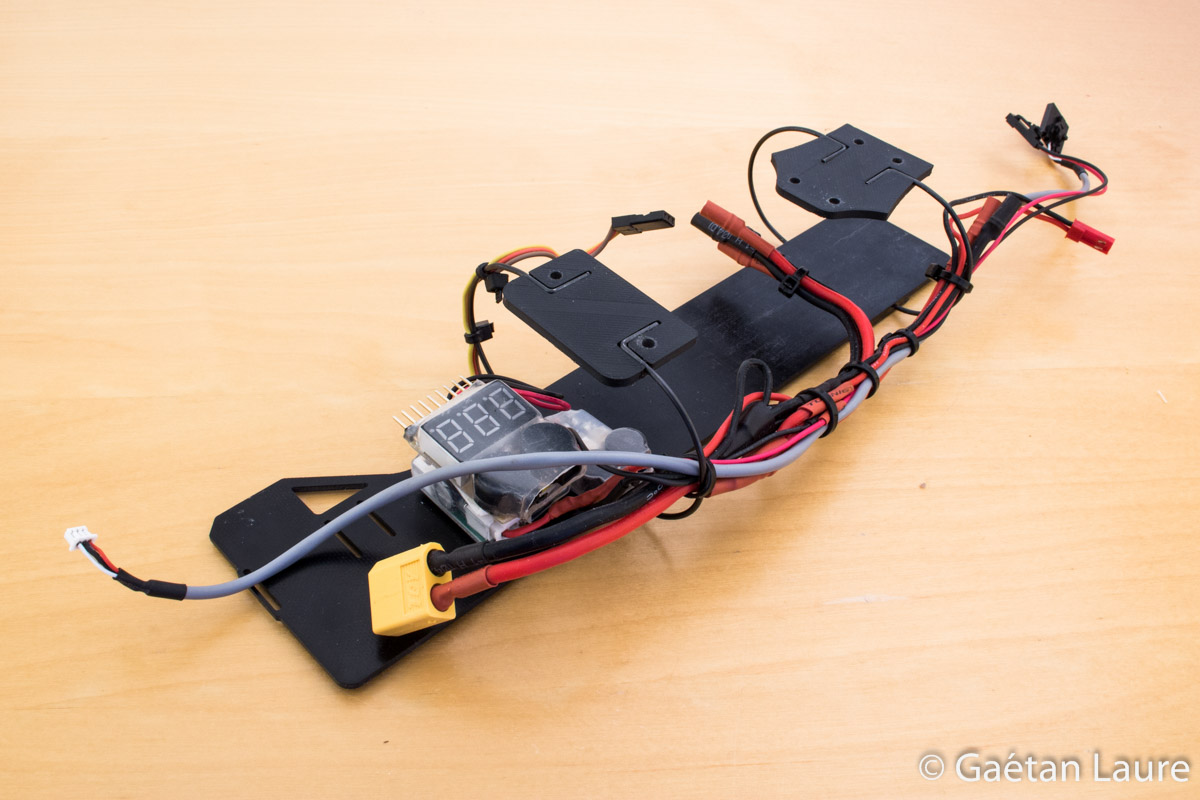
I just removed the battery tray from the frame. I'm going to drill two holes to attach the gimbal.

The holes are drilled with a diameter of 2.5 mm.

They are located at 65.5 mm from the front of the battery tray.
The gimbal finally mounted on the battery tray.


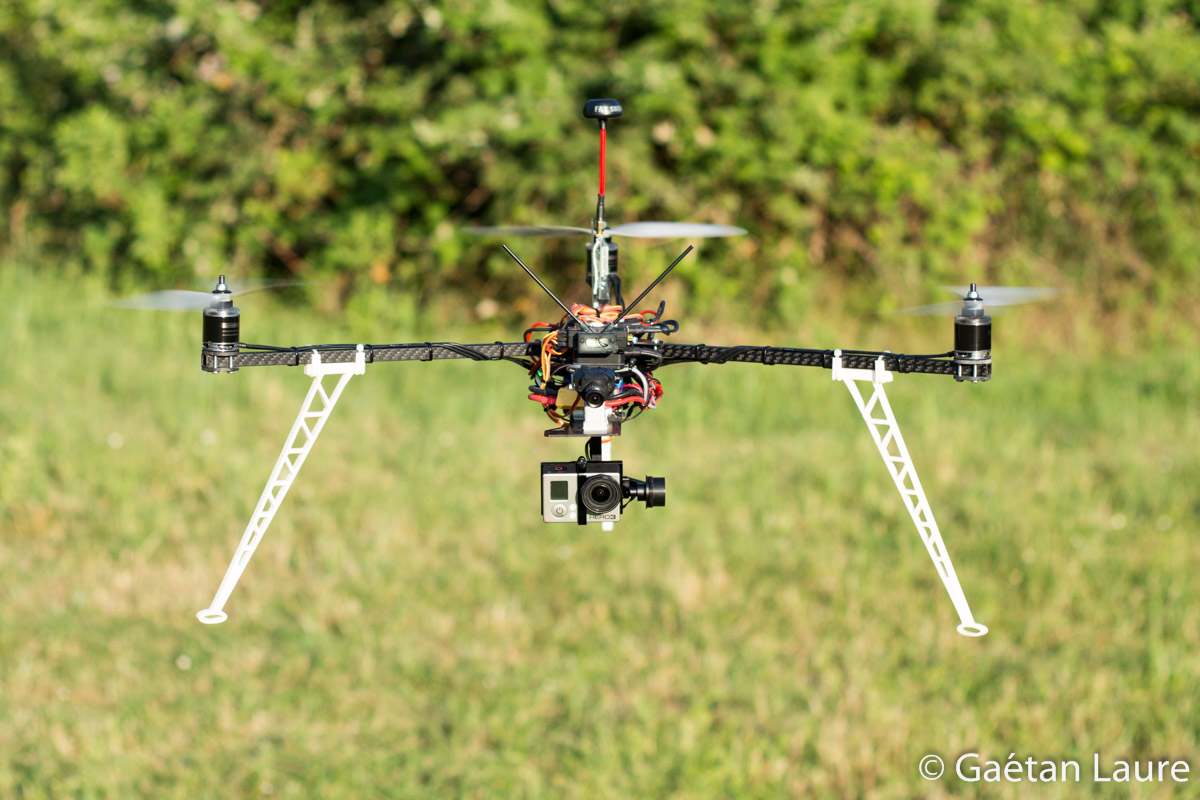
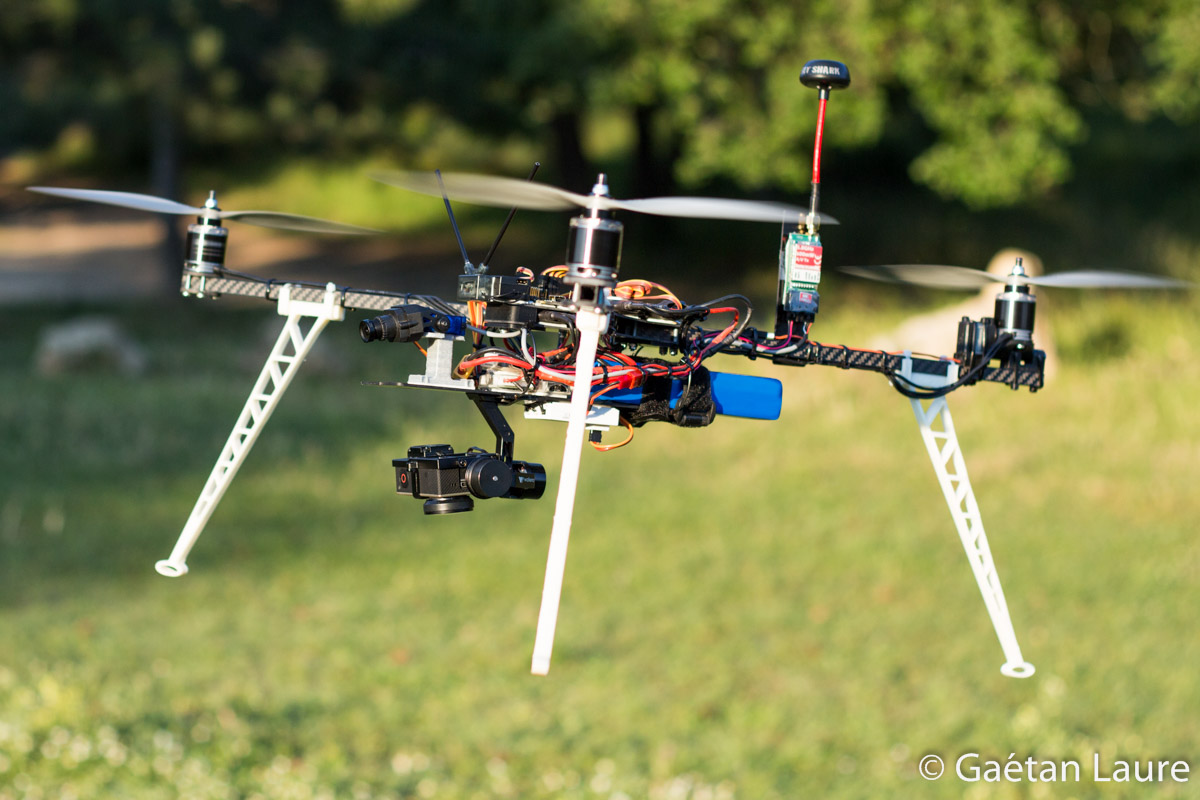
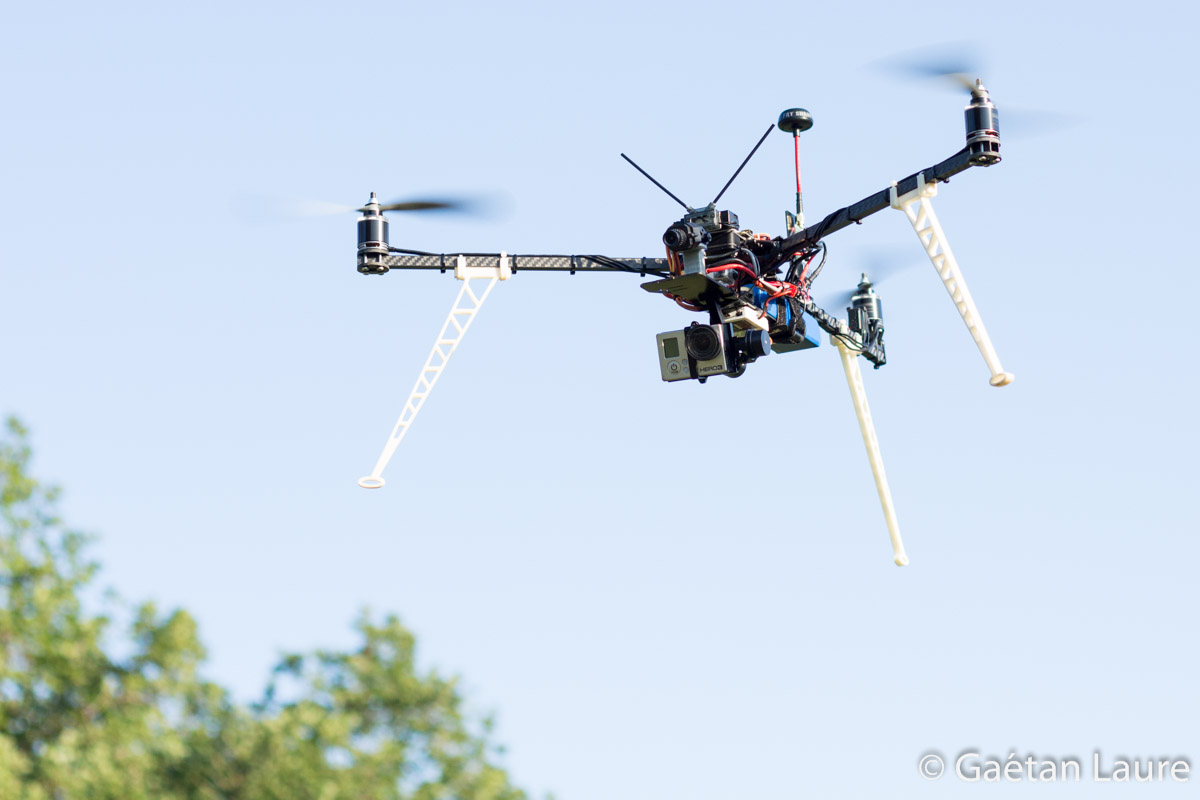
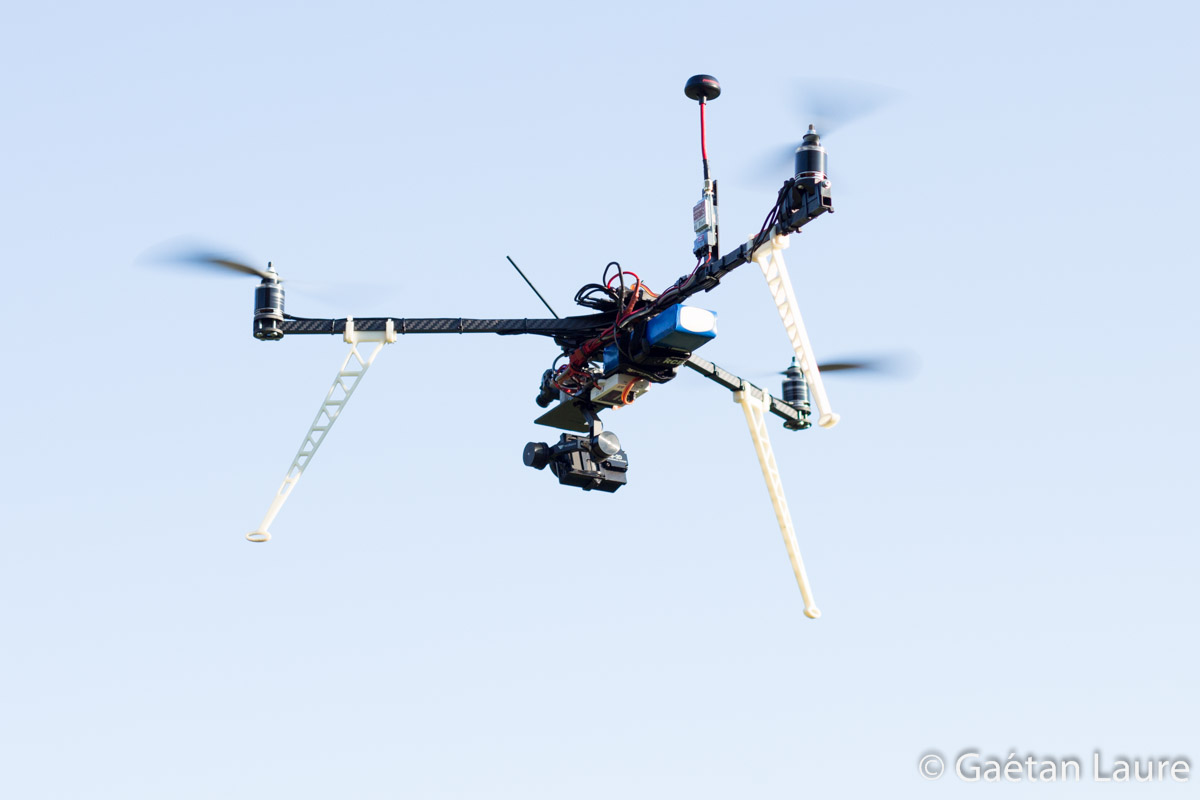
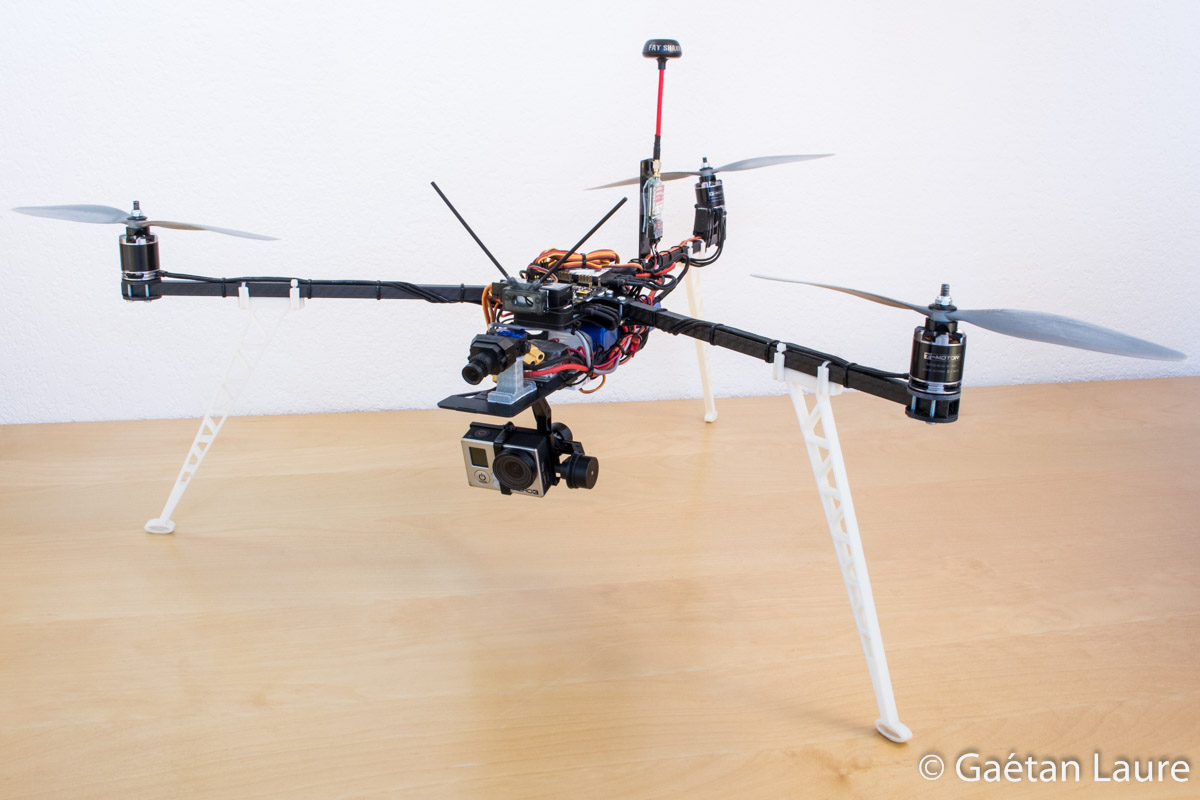
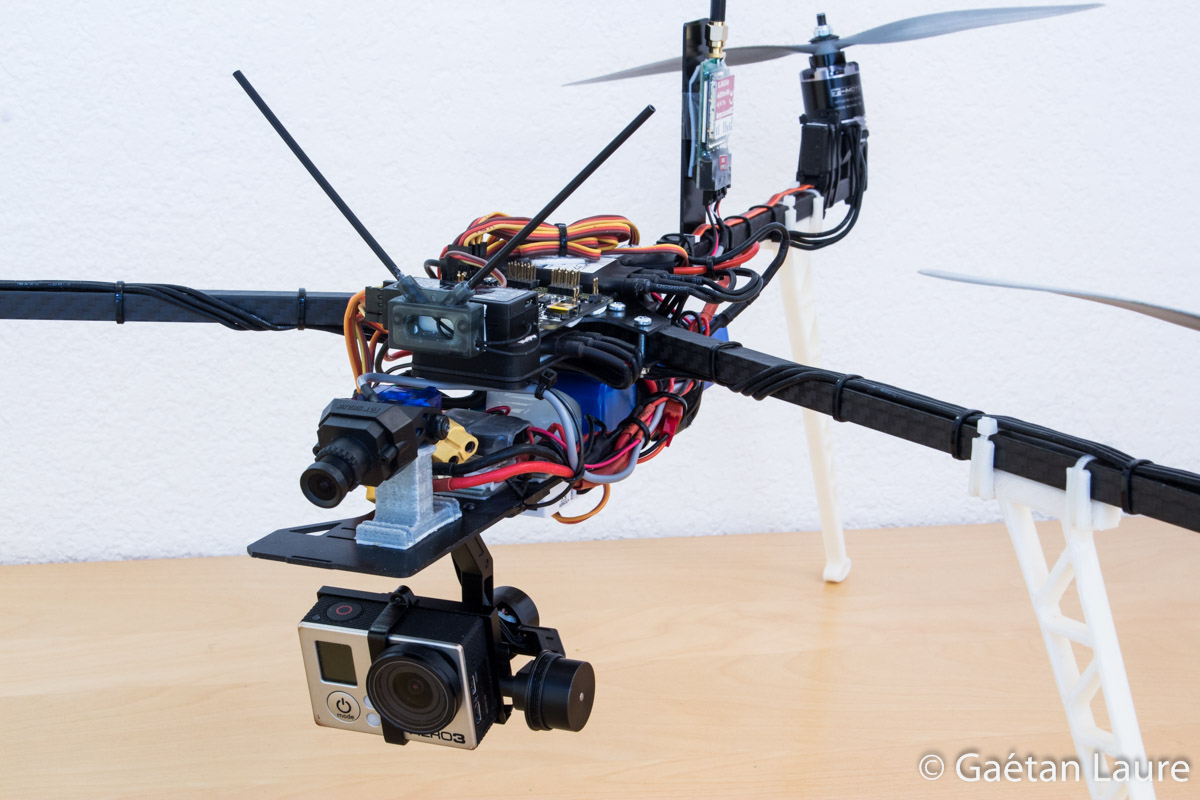
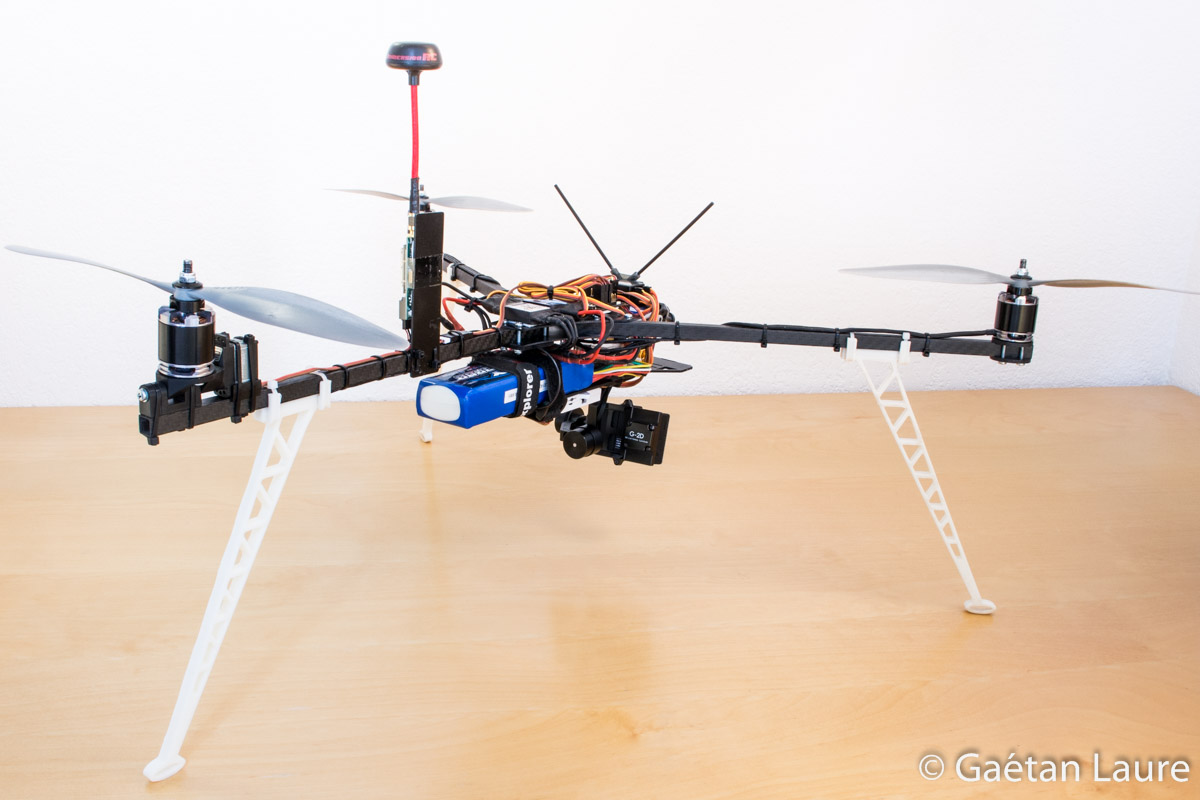
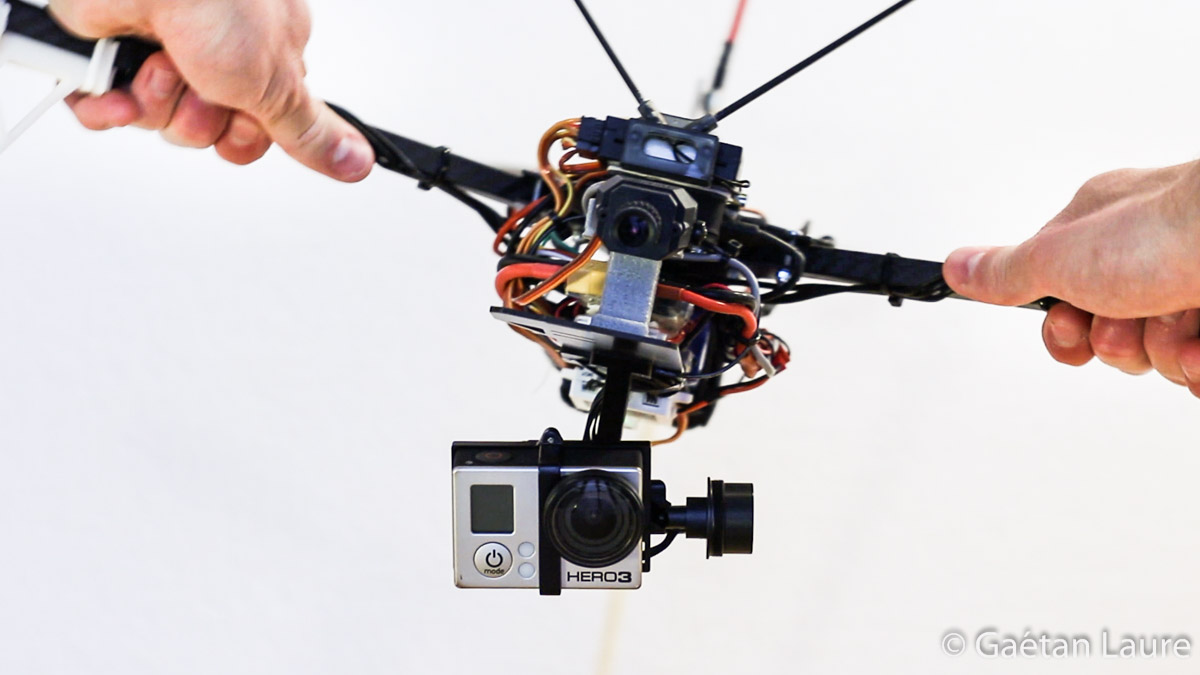
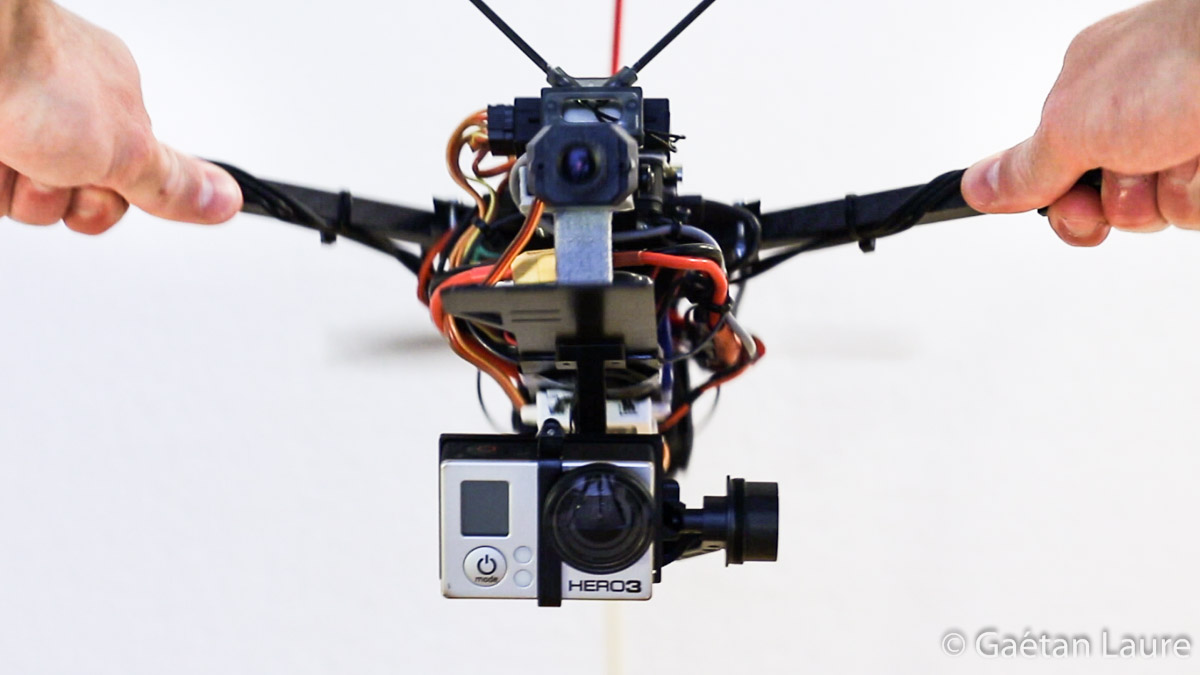
The gimbal and the GoPro installed on the tricopter.
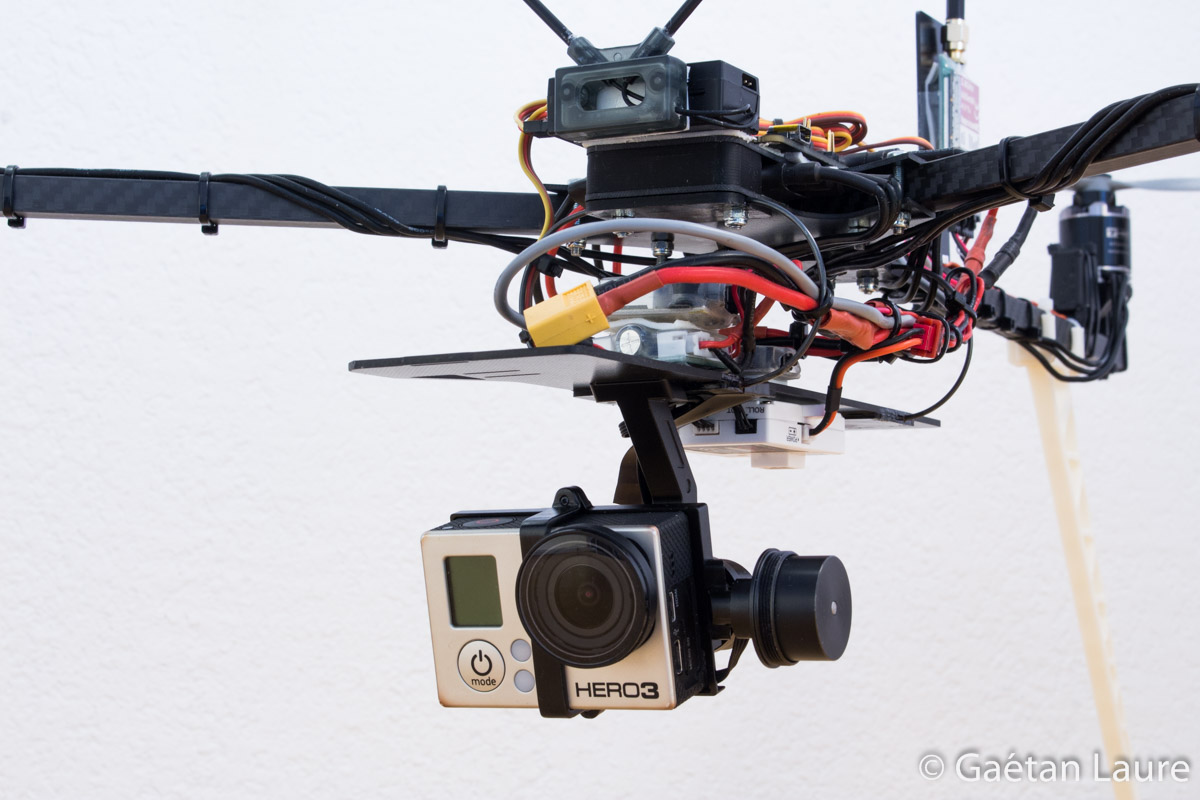
It looks pretty good!
I'm wiring the gimbal controller board to the RC receiver to enable pitch control from the ground.

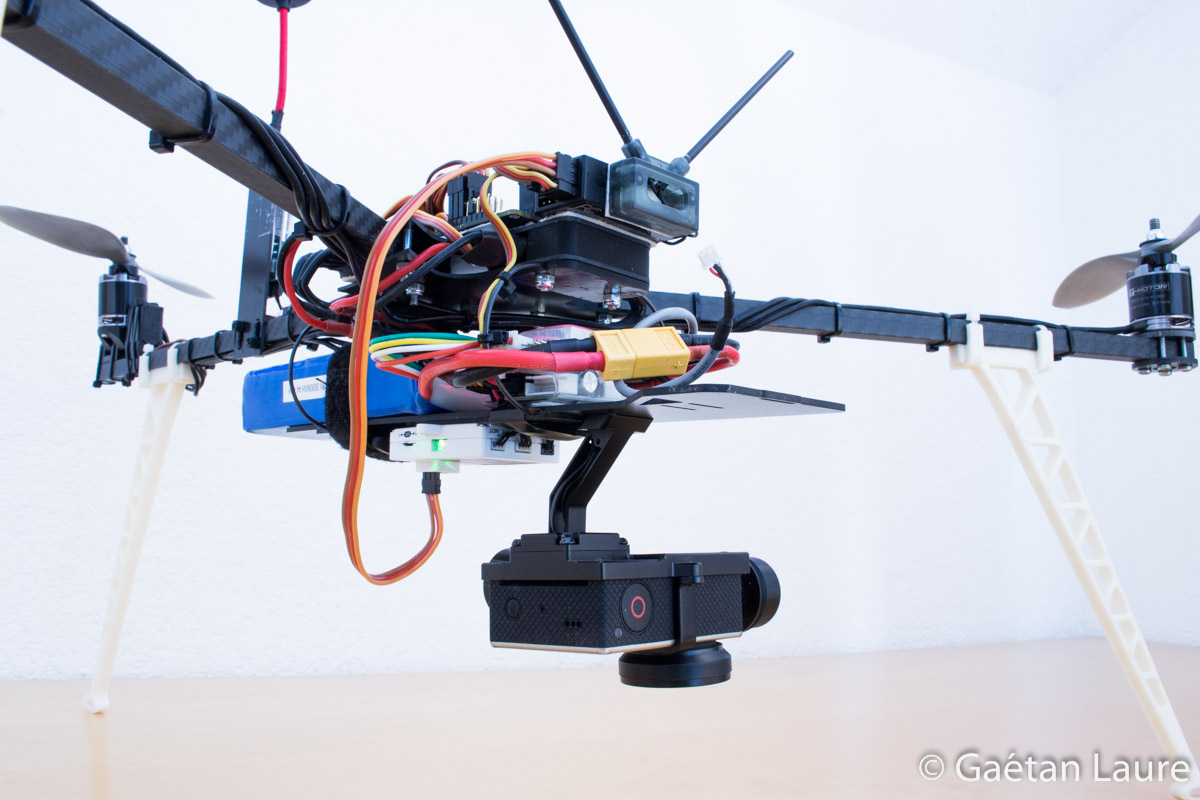
The camera can be tilted down. It's really useful for mapping applications.
Almost finished! Let's finally install the FPV camera (to get the live video feedback in the FatShark goggles). I use separate cameras for FPV and recording for more reliability. Then, if the GoPro accidentally turns down, I still have the video feedback in my goggles through the FPV camera.
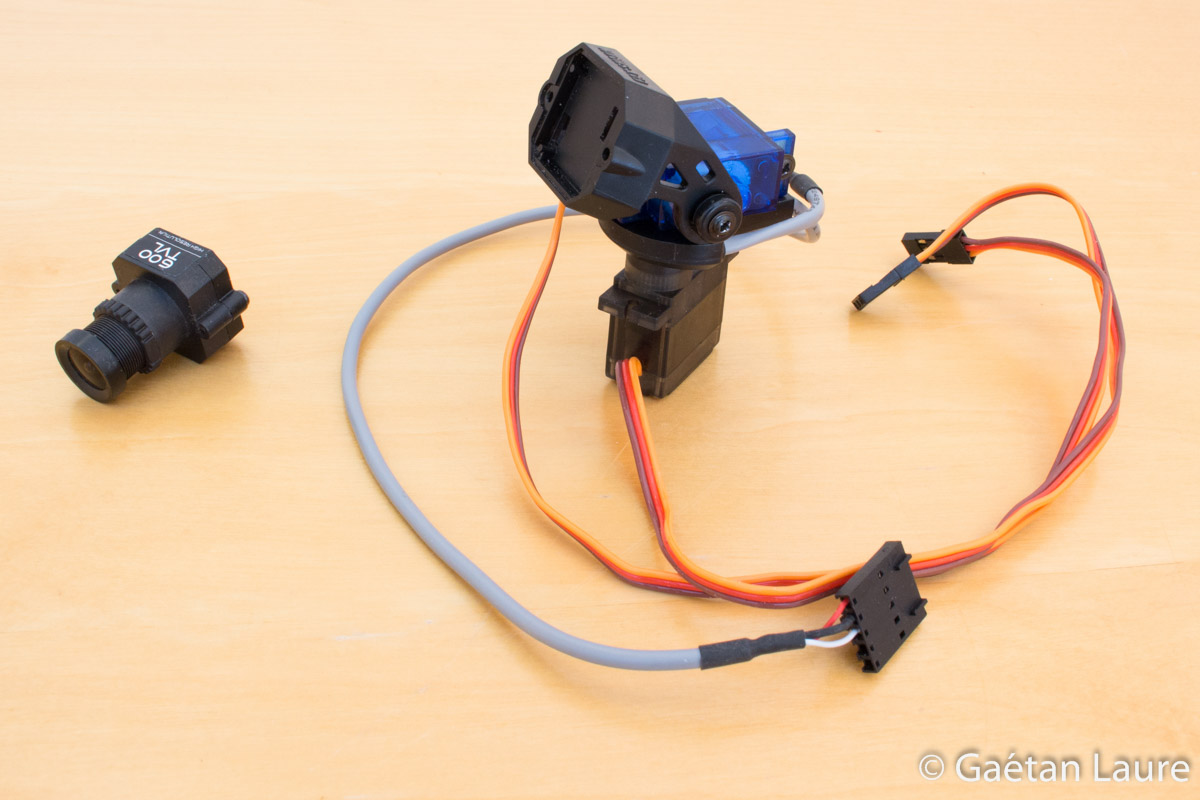
I bought this Fatshark pan/tilt mount to be able to control the FPV camera direction. Especially to be able to orient the camera down for easier FPV landing.
To begin with, I just want to control the camera around the pitch axis. This is why I redesigned the bottom part of the camera mount.

It's designed in two parts for being easily printed.

It's being 3D printed.
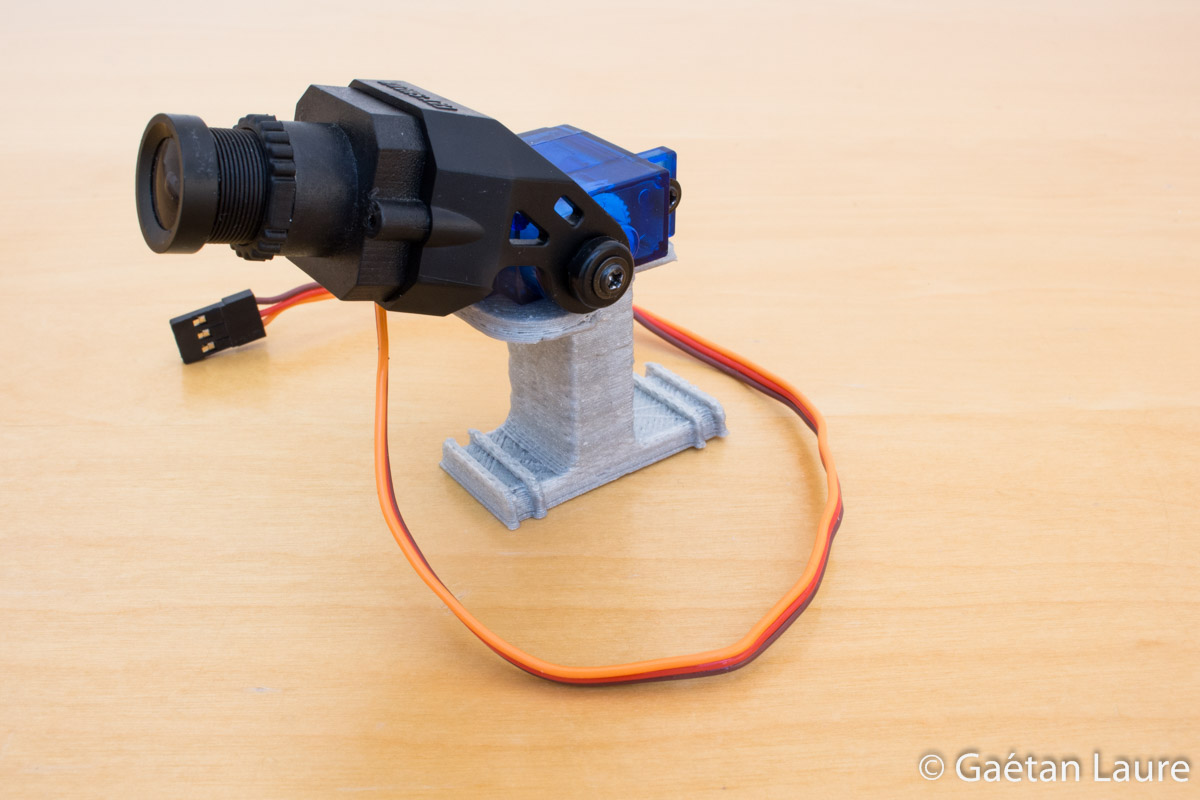
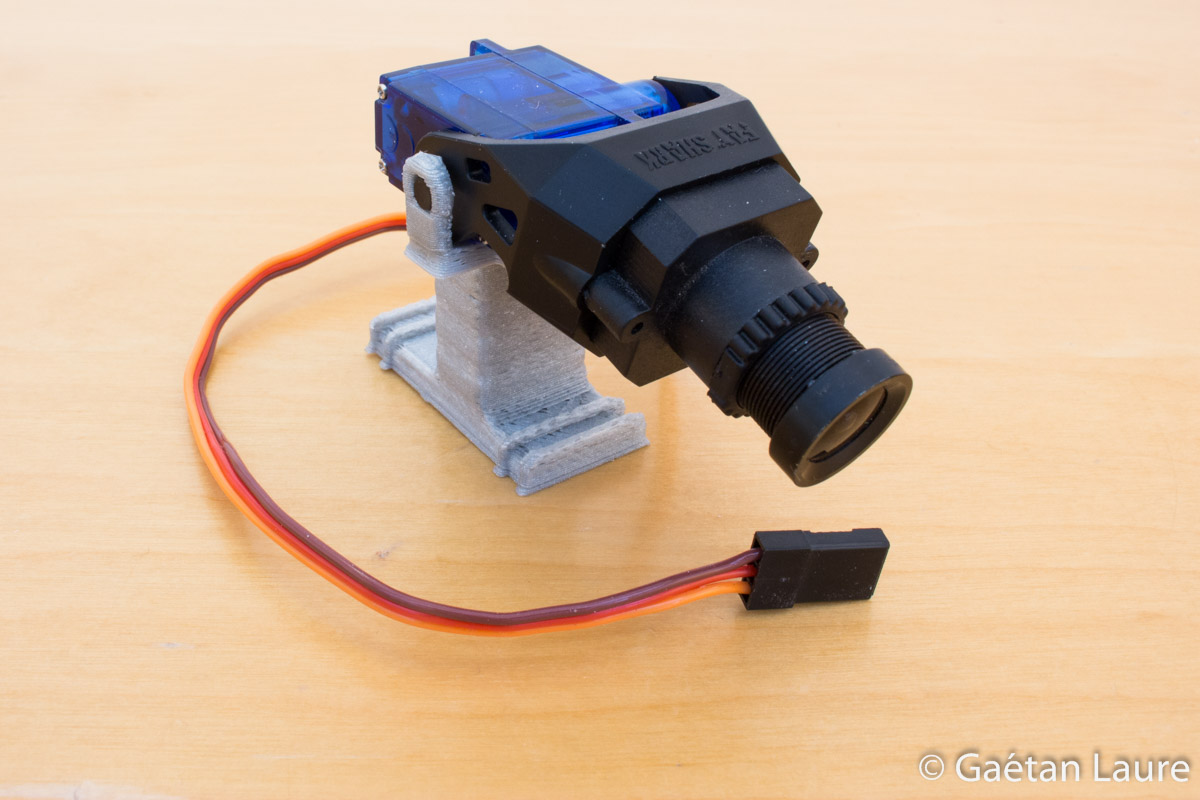
The camera and the top servo motor screwed on the 3D printed mount.
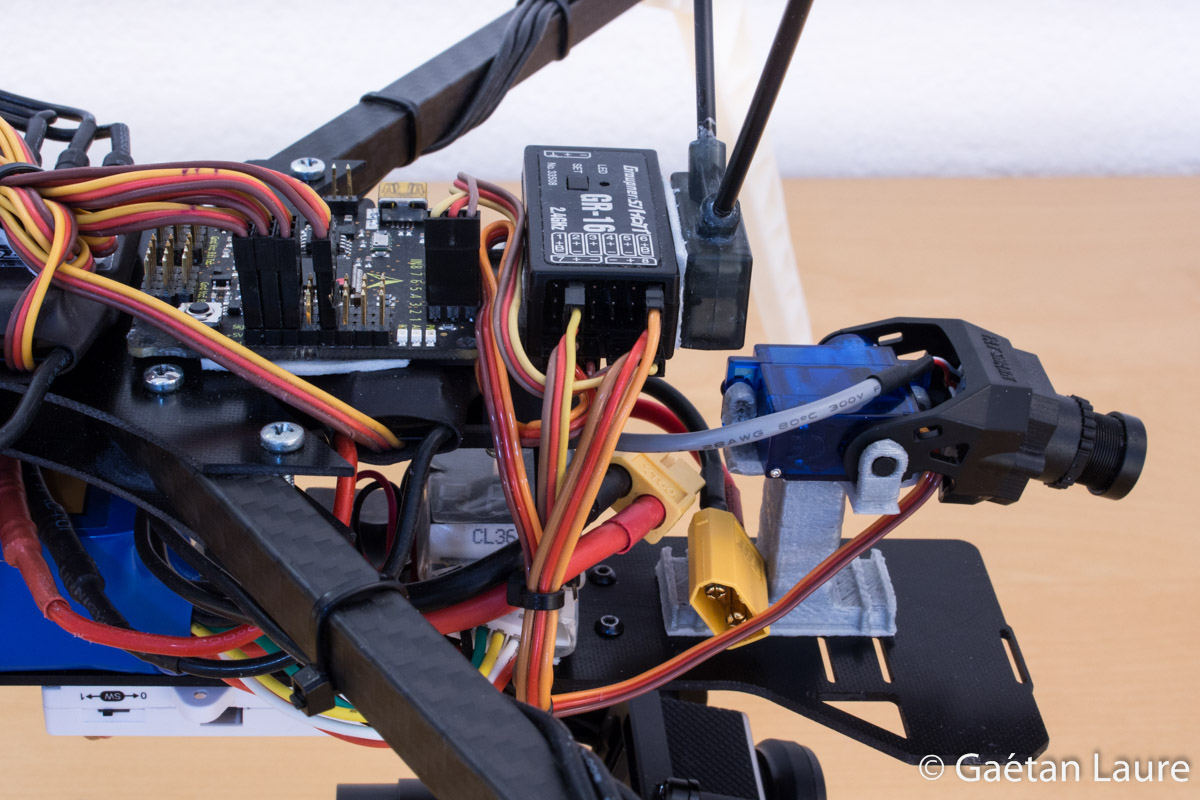
The camera mount has been fixed on the battery tray using double sided tape. It holds the camera mount enough strongly and acts as a mechanical fuse to protect the FPV camera in case of a crash.
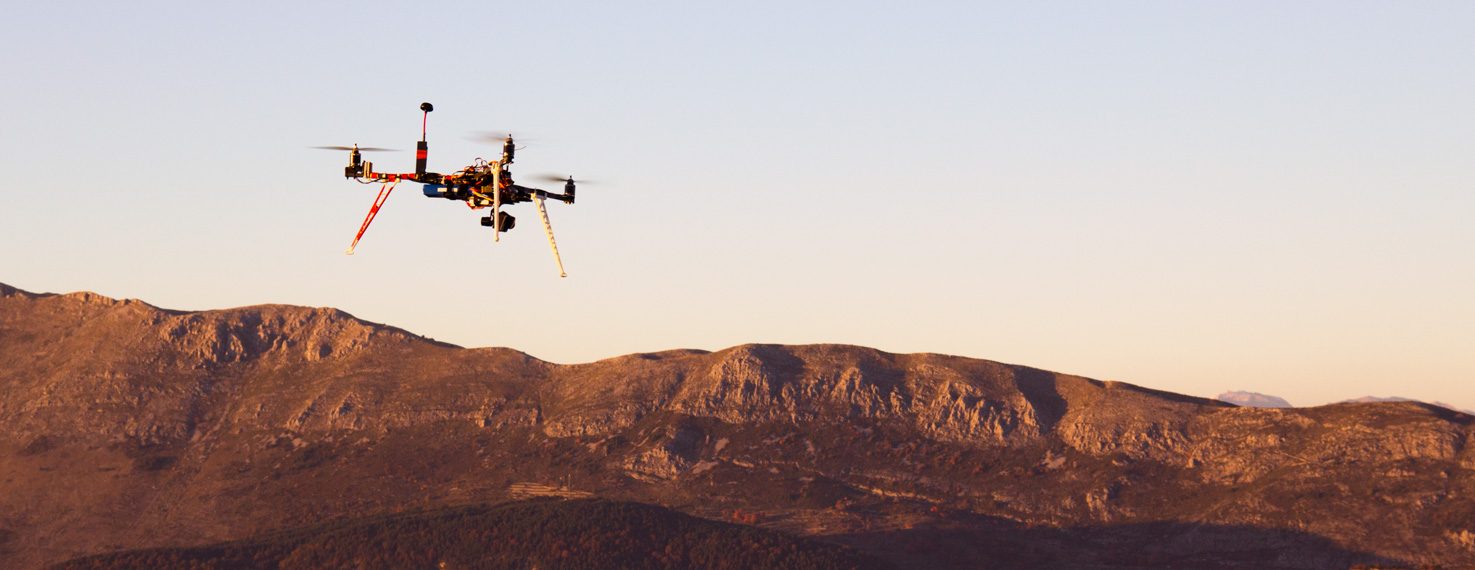
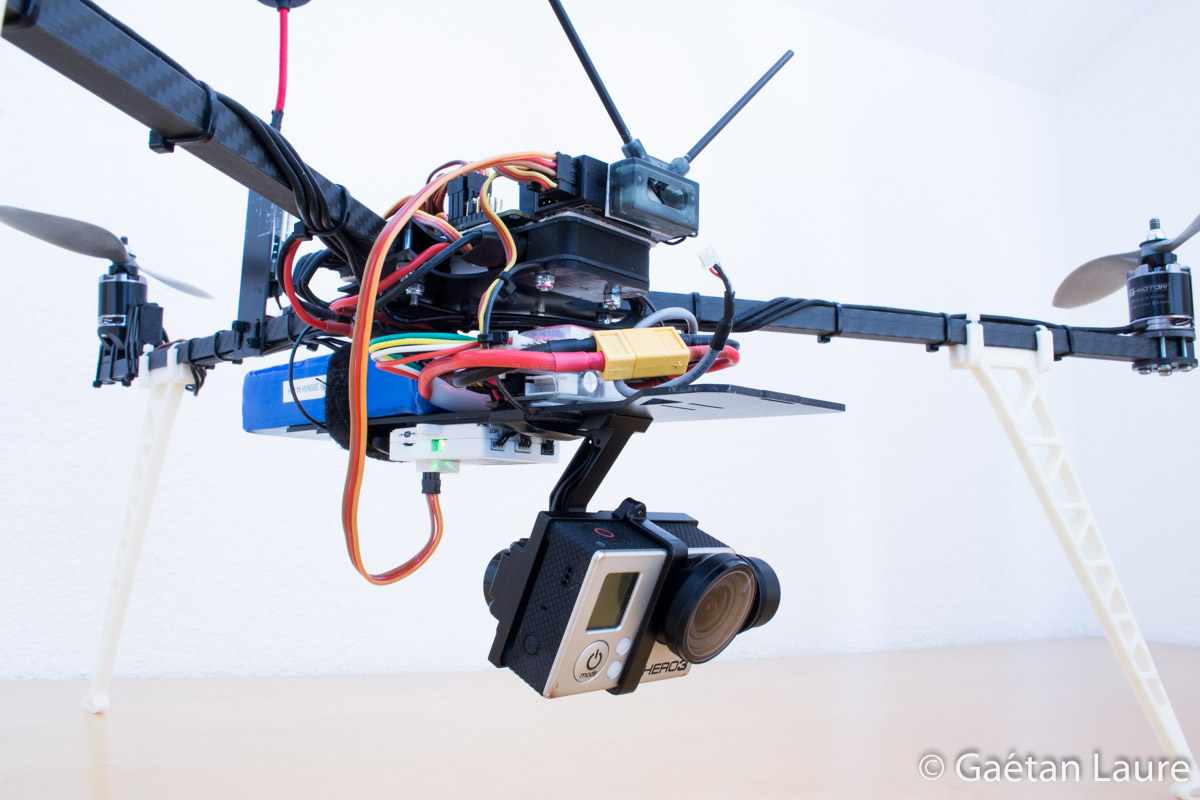
The build is finished! Some pictures of the result:


Let's now show the different orientations that can be taken by both cameras:
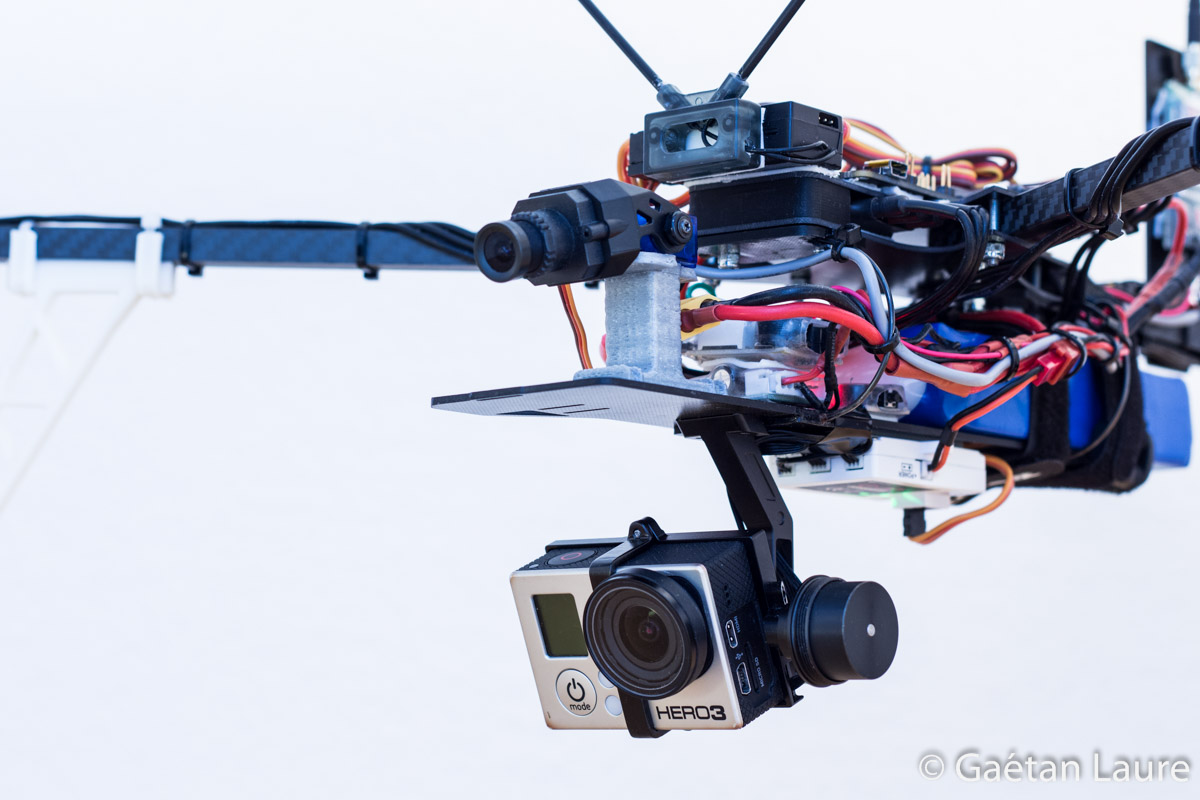
Default orientations. Both cameras are slightly tilted down in order to get more ground than sky in their fields of view.

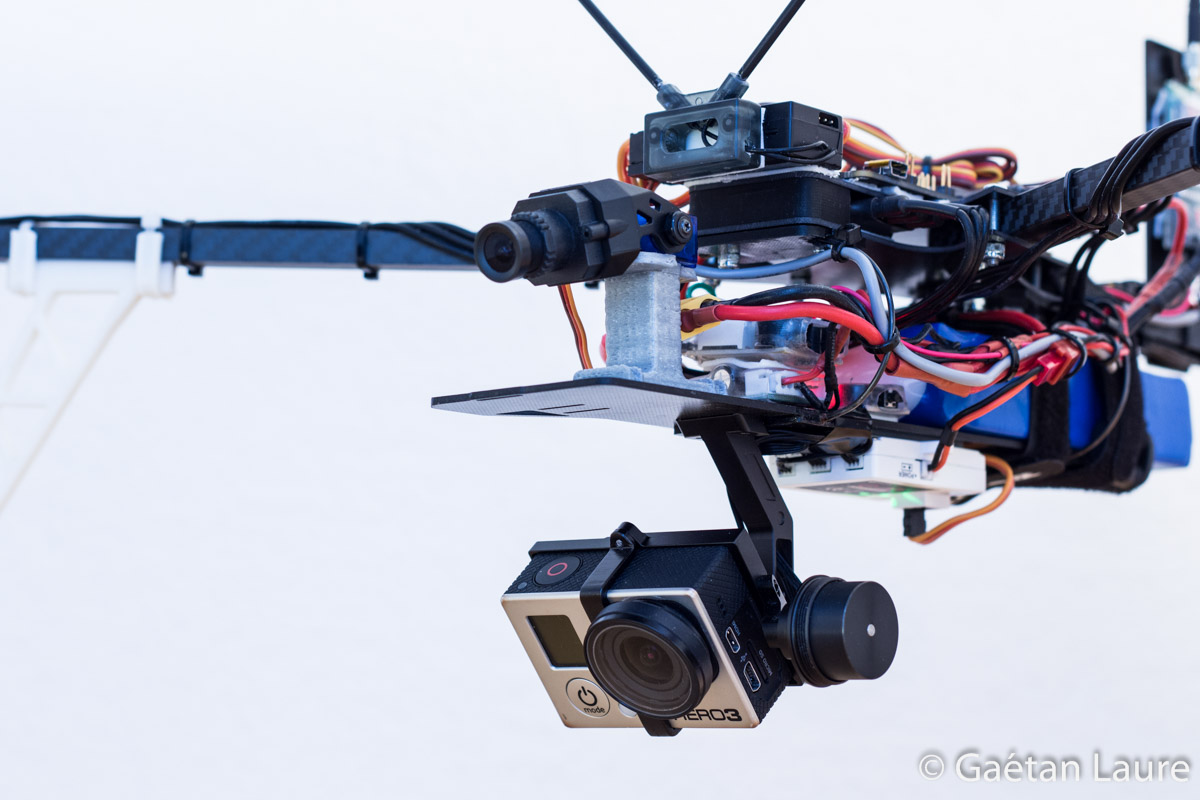
The FPV camera tilted down, very useful for FPV landing.
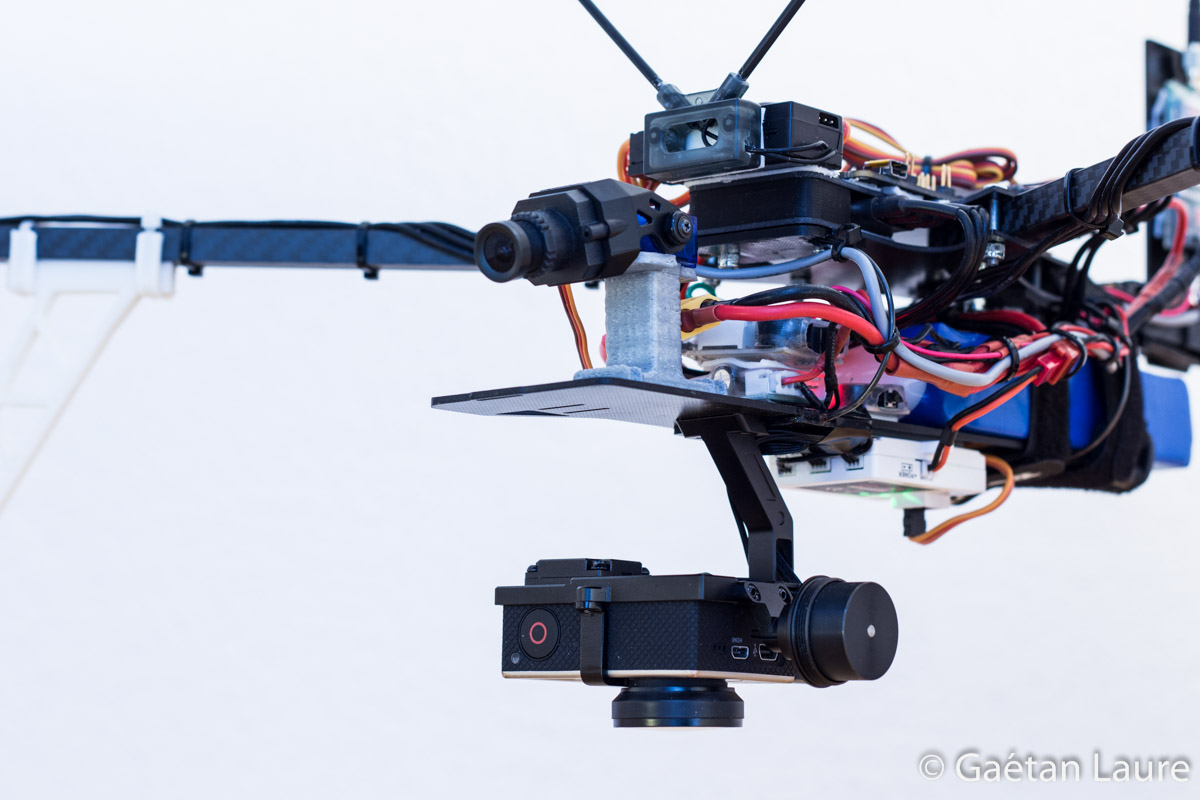
The GoPro camera tilted at 45°, ideal for 3D reconstruction applications.
The GoPro camera tilted down, ideal for mapping applications.
A short video to see how all of these orientations are controlled from the radio:
The gimbal works nicely:
Roll axis stabilization.
Pitch axis stabilization.
A short video to see that in motion:
It's time to fly!